
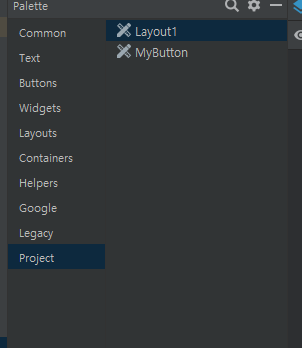
티스토리 뷰
직전 포스팅에서 커스텀 버튼 객체를 만들고 이를 레이아웃에 넣어보는 예제를 했다.
버튼과 마찬가지로 레이아웃도 뷰 객체이기 때문에 레이아웃으로 구성된 위젯 객체를 직접 만들 수 있다.
또한 카드뷰를 사용하여 내부 레이아웃의 디자인이 좀 더 둥글고 심플하게 변경할 수 있다.
바로 한번 확인해보자.
우선, layout1.xml 파일을 생성하여 다음과 같이 카드뷰를 삽입하고 그 내부에 레이아웃과 이미지 뷰 & 텍스트뷰를 넣어 구성해준다.
◎layout1.xml
<?xml version="1.0" encoding="utf-8"?>
<LinearLayout xmlns:android="http://schemas.android.com/apk/res/android"
              xmlns:app="http://schemas.android.com/apk/res-auto" android:layout_width="match_parent"
              android:layout_height="wrap_content" android:orientation="vertical">

    <androidx.cardview.widget.CardView
            android:layout_width="match_parent"
            android:layout_height="match_parent"
            android:layout_weight="1"
            app:cardBackgroundColor="#FFFFFF"
            app:cardCornerRadius="10dp"
            app:cardElevation="5dp"
            app:cardUseCompatPadding="true"

    >
        <LinearLayout
                android:orientation="horizontal"
                android:layout_width="match_parent"
                android:layout_height="match_parent">
            <ImageView
                    android:layout_width="243dp"
                    android:layout_height="50dp" app:srcCompat="@android:mipmap/sym_def_app_icon"
                    android:id="@+id/imageView2" android:layout_weight="1"/>
            <LinearLayout
                    android:orientation="vertical"
                    android:layout_width="match_parent"
                    android:layout_height="match_parent" android:layout_weight="1">

                <TextView
                        android:text="TextView"
                        android:layout_width="match_parent"
                        android:layout_height="25dp" android:id="@+id/textView7"/>
                <TextView
                        android:text="TextView"
                        android:layout_width="match_parent"
                        android:layout_height="25dp" android:id="@+id/textView8"/>
            </LinearLayout>
        </LinearLayout>
    </androidx.cardview.widget.CardView>
</LinearLayout>
이후에 LinearLayout을 상속 받은 Layout1.class 객체를 생성하고, layout1 레이아웃을 inflate 한다.
해당 객체가 생성됐을 때, 이미지와 텍스트를 set할 수 있도록 생성자를 구성한다.
◎Layout1.java
package com.example.sampleview;

import android.content.Context;
import android.util.AttributeSet;
import android.view.LayoutInflater;
import android.widget.ImageView;
import android.widget.LinearLayout;
import android.widget.TextView;
import androidx.annotation.Nullable;

public class Layout1 extends LinearLayout {

    ImageView imageView;
    TextView textView;
    TextView textView2;

    public Layout1(Context context) {
        super(context);
        init(context);
    }

    public Layout1(Context context, @Nullable AttributeSet attrs) {
        super(context, attrs);
        init(context);
    }

    private void init(Context context) {
        LayoutInflater inflater = (LayoutInflater) context.getSystemService(Context.LAYOUT_INFLATER_SERVICE);
        inflater.inflate(R.layout.layout1, this, true);

         imageView = findViewById(R.id.imageView2);
         textView = findViewById(R.id.textView7);
         textView2 = findViewById(R.id.textView8);
    }

    public void setImage(int resId) {
        imageView.setImageResource(resId);
    }

    public void setName(String name) {
        textView.setText(name);
    }

    public void setPhone(String phone) {
        textView2.setText(phone);
    }
}
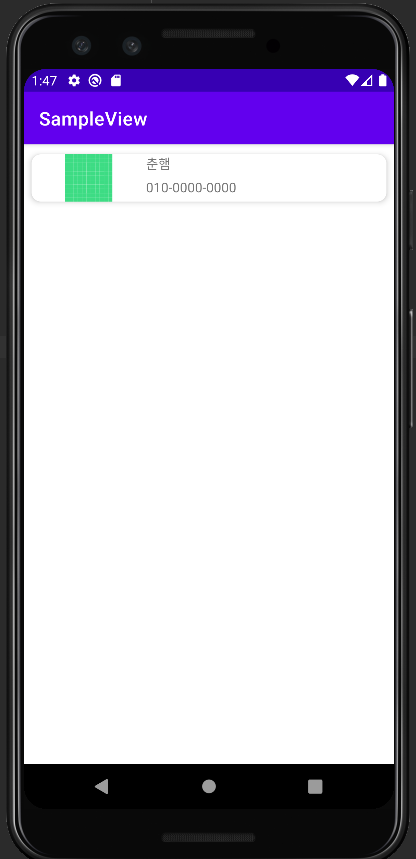
이제, 마무리로 layout1 객체를 activity_main.xml에 끌어와 추가해주기만 하면 된다.
◎activity_main.xml
<?xml version="1.0" encoding="utf-8"?>
<LinearLayout
        xmlns:android="http://schemas.android.com/apk/res/android"
        xmlns:tools="http://schemas.android.com/tools"
        xmlns:app="http://schemas.android.com/apk/res-auto"
        android:layout_width="match_parent"
        android:layout_height="match_parent"
        tools:context=".MainActivity" android:orientation="vertical">
    <com.example.sampleview.Layout1
            android:layout_width="match_parent"
            android:layout_height="wrap_content"
            android:id="@+id/layout1"
    />
</LinearLayout>
◎MainActivity.java
package com.example.sampleview;

import androidx.appcompat.app.AppCompatActivity;
import android.os.Bundle;

public class MainActivity extends AppCompatActivity {

    @Override
    protected void onCreate(Bundle savedInstanceState) {
        super.onCreate(savedInstanceState);
        setContentView(R.layout.activity_main);

        Layout1 layout1 = findViewById(R.id.layout1);

        layout1.setImage(R.drawable.ic_launcher_background);
        layout1.setName("춘햄");
        layout1.setPhone("010-0000-0000");

    }
}
반응형
'Mobile > Android' 카테고리의 다른 글
| [Android] 선택 위젯 4: Spinner (0) | 2022.04.03 |
|---|---|
| [Android] 선택 위젯 3: Recycler View (0) | 2022.04.03 |
| [Android] 선택 위젯 1: 새로운 뷰 객체 생성 (0) | 2022.04.02 |
| [Android] 위험 권한 (0) | 2022.03.31 |
| [Android] 브로드캐스트 수신자 이해하기 (0) | 2022.03.30 |
Comments
Related Articles
more


최근에 올라온 글
최근에 달린 댓글
TAG
- 이탈리안 레스토랑
- 파니노구스토
- react-native
- await
- 맛집
- react
- Promise
- 인천 구월동 이탈리안 맛집
- 인천 구월동 맛집
- Async
- AsyncStorage
- javascript
- redux
- 정보보안기사 #실기 #정리
- redux-thunk
- Total
- Today
- Yesterday