
티스토리 뷰
직전 포스팅에서 다뤘던 Fragment를 사용하여 버튼을 누를 때마다 새로운 이미지를 띄우는 화면 전환 예제를 구현해보려고 한다.
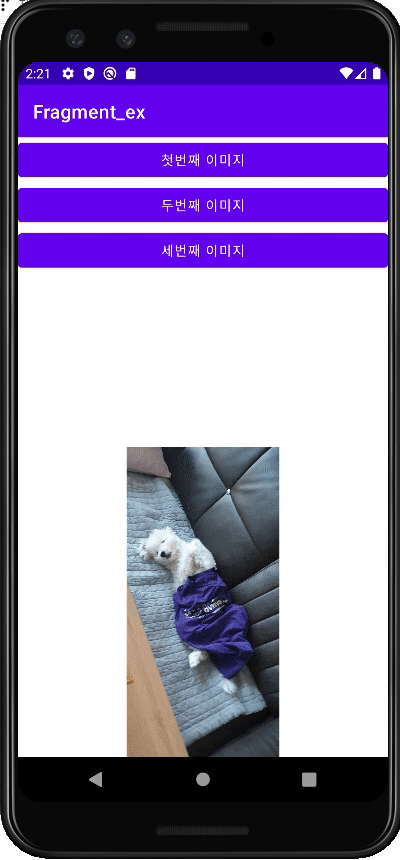
activity_main.xml 과 2개의 Fragment를 사용하며, 첫번째 fragment는 fragment_list.xml로 각 이미지를 변경하는 역할을 하는 3개의 버튼을 가지도록 구성하고 두번째 fragment는 이미지를 띄울 ImageView 1개로 구성한다.
바로 한번 들어가보자.
◎fragment_list.xml
<?xml version="1.0" encoding="utf-8"?>
<LinearLayout xmlns:android="http://schemas.android.com/apk/res/android"
              android:layout_width="match_parent"
              android:layout_height="match_parent" android:orientation="vertical">

    <Button
            android:text="첫번째 이미지"
            android:layout_width="match_parent"
            android:layout_height="wrap_content" android:id="@+id/button"/>
    <Button
            android:text="두번째 이미지"
            android:layout_width="match_parent"
            android:layout_height="wrap_content" android:id="@+id/button2"/>
    <Button
            android:text="세번째 이미지"
            android:layout_width="match_parent"
            android:layout_height="wrap_content" android:id="@+id/button3"/>
</LinearLayout>
◎ListFragment.java
package com.example.fragment_ex;

import android.content.Context;
import android.os.Bundle;
import android.view.LayoutInflater;
import android.view.View;
import android.view.ViewGroup;
import android.widget.Button;
import androidx.annotation.NonNull;
import androidx.annotation.Nullable;
import androidx.fragment.app.Fragment;

public class ListFragment extends Fragment {

    public static interface ImageSelectionCallback {
        public void onImageSelected(int position);
    }

    public ImageSelectionCallback callback;

    @Override
    public void onAttach(@NonNull Context context) {
        super.onAttach(context);

        if (context instanceof ImageSelectionCallback) {
            callback = (ImageSelectionCallback) context;
        }
    }

    @Nullable
    @Override
    public View onCreateView(@NonNull LayoutInflater inflater, @Nullable ViewGroup container, @Nullable Bundle savedInstanceState) {
        ViewGroup rootView = (ViewGroup) inflater.inflate(R.layout.fragment_list, container, false);
        Button button = rootView.findViewById(R.id.button);

        button.setOnClickListener(new View.OnClickListener() {
            @Override
            public void onClick(View v) {
                if(callback != null) {
                    callback.onImageSelected(0);
                }
            }
        });

        Button button2 = rootView.findViewById(R.id.button2);
        button2.setOnClickListener(new View.OnClickListener() {
            @Override
            public void onClick(View v) {
                if(callback != null) {
                    callback.onImageSelected(1);
                }
            }
        });

        Button button3 = rootView.findViewById(R.id.button3);
        button3.setOnClickListener(new View.OnClickListener() {
            @Override
            public void onClick(View v) {
                if(callback != null) {
                    callback.onImageSelected(2);
                }
            }
        });

        return rootView;
    }
}
java 코드는 위와 같으며, list fragment가 main activity에 호출되었을 때 onAttach() 메서드로 해당 액티비티를 받아온다.
이 때, 만약 fragment를 호출하는 액티비티의 갯수가 1개가 아닌 여러 개라면 액티비티가 변경될 때마다 해당 액티비티 객체를 불러와야 하는 경우가 생기기 때문에 ListFragment Class 내부에 ImageSelectedCallback 인터페이스를 작성하고 fragment를 호출하는 액티비티 클래스가 이를 구현하여 onImageSelected() 메서드를 재정의 하도록 구성한다.
◎fragment_viewer.xml
<?xml version="1.0" encoding="utf-8"?>
<LinearLayout xmlns:android="http://schemas.android.com/apk/res/android"
              xmlns:app="http://schemas.android.com/apk/res-auto" xmlns:tools="http://schemas.android.com/tools"
              android:layout_width="match_parent"
              android:layout_height="match_parent" android:orientation="vertical">

    <ImageView
            android:layout_width="match_parent"
            android:layout_height="334dp" tools:srcCompat="@drawable/img1" android:id="@+id/imageView"
    />
</LinearLayout>
◎ViewerFragment.java
package com.example.fragment_ex;

import android.os.Bundle;
import android.view.LayoutInflater;
import android.view.View;
import android.view.ViewGroup;
import android.widget.ImageView;
import androidx.annotation.NonNull;
import androidx.annotation.Nullable;
import androidx.fragment.app.Fragment;

import java.util.zip.Inflater;

public class ViewerFragment extends Fragment {
    ImageView imageView;

    @Nullable
    @Override
    public View onCreateView(@NonNull LayoutInflater inflater, @Nullable ViewGroup container, @Nullable Bundle savedInstanceState) {
        ViewGroup rootView = (ViewGroup) inflater.inflate(R.layout.fragment_viewer, container, false);

        imageView = rootView.findViewById(R.id.imageView);
        return rootView;
    }

    public void setImage(int resId) {
        imageView.setImageResource(resId);
    }
}
Viewer Fragment는 특별한 내용 없이, ImageView 객체에 이미지를 넣어줄 수 있도록 setImage() 메서드만 작성한다.
◎activity_main.xml
<?xml version="1.0" encoding="utf-8"?>
<LinearLayout
        xmlns:android="http://schemas.android.com/apk/res/android"
        xmlns:tools="http://schemas.android.com/tools"
        xmlns:app="http://schemas.android.com/apk/res-auto"
        android:layout_width="match_parent"
        android:layout_height="match_parent"
        tools:context=".MainActivity" android:orientation="vertical">
    <fragment
            android:layout_width="match_parent"
            android:layout_height="match_parent" android:name="com.example.fragment_ex.ListFragment"
            android:id="@+id/listFragment" android:layout_weight="1"/>
    <fragment
            android:layout_width="match_parent"
            android:layout_height="match_parent" android:name="com.example.fragment_ex.ViewerFragment"
            android:id="@+id/viewerFragment" android:layout_weight="1"/>
</LinearLayout>
activity_main.xml 파일은 앞서 작성한 2개의 fragments를 화면의 1/2씩 채우도록 작성한다.
◎MainActivity.java
package com.example.fragment_ex;

import androidx.appcompat.app.AppCompatActivity;
import android.os.Bundle;
import androidx.fragment.app.FragmentManager;

public class MainActivity extends AppCompatActivity implements ListFragment.ImageSelectionCallback{

    ListFragment listFragment;
    ViewerFragment viewerFragment;

    int[] images = {R.drawable.img1, R.drawable.img2, R.drawable.img3};

    @Override
    protected void onCreate(Bundle savedInstanceState) {
        super.onCreate(savedInstanceState);
        setContentView(R.layout.activity_main);

        FragmentManager manager = getSupportFragmentManager();
        listFragment = (ListFragment) manager.findFragmentById(R.id.listFragment);
        viewerFragment = (ViewerFragment) manager.findFragmentById(R.id.viewerFragment);
    }

    @Override
    public void onImageSelected(int position) {
        viewerFragment.setImage(images[position]);
    }
}
MainActivity 클래스에서는 ImageSelectionCallback 인터페이스를 구현한 뒤, onImageSelected() 메서드를 Viewer에 이미지를 띄울 수 있도록 위와 같이 작성해주면 끝이 난다.
끝!
'Mobile > Android' 카테고리의 다른 글
| [Android] Action Bar 2: 액션바에 View 삽입 (0) | 2022.03.23 |
|---|---|
| [Android] Action Bar 1: 메뉴 이해하기 (0) | 2022.03.23 |
| [Android] 화면 간 전환 6: Fragment 이해하기 (0) | 2022.03.21 |
| [Android] 화면 간 전환 5: 액티비티의 생명 주기 (0) | 2022.03.20 |
| [Android] 화면 간 전환 4: Intent.putExtra()로 Object 넘기기 (0) | 2022.03.20 |


- 맛집
- AsyncStorage
- Promise
- javascript
- react
- 정보보안기사 #실기 #정리
- 인천 구월동 이탈리안 맛집
- 파니노구스토
- redux-thunk
- 이탈리안 레스토랑
- react-native
- 인천 구월동 맛집
- Async
- redux
- await
- Total
- Today
- Yesterday