티스토리 뷰
자바스크립트 엔진을 기반으로 웹 브라우저뿐만 아니라 서버에서도 자바스크립트를 사용할 수 있는 런타임이 바로 지금까지 사용했던 node.js 이다.
Node.js 환경에서 웹 서버를 구축할 때는 보통 Express, Hapi, Koa 등의 웹 프레임워크를 사용하지만, 이번 포스팅에서는 책에 나와 있는 그대로 Koa를 사용하여 백엔드 서버를 구축하려고 한다.
Koa는 Express의 기존 개발 팀이 개발한 프레임워크이며, 미들웨어, 라우팅, 템플릿, 파일 호스팅 등과 같은 다양한 기능이 자체적으로 내장되어 있는 Express와는 달리 미들웨어 기능만 갖추고 있으며 나머지는 다른 라이브러리를 적용하여 사용한다.
Koa는 또한 async/await 문법을 정식으로 지원하기 때문에 비동기 작업을 더 편하게 관리할 수 있다는 장점이 있다.
바로 한번 실습해보자.
프로젝트 구성
인텔리제이에는 따로 Koa Generator는 제공하지 않기 때문에 npm 명령어로 직접 프로젝트 디렉토리를 설정하고, Koa를 설치한 뒤에 따로 해당 프로젝트를 불러와야 한다.
우선, 프로젝트를 만들 디렉토리를 하나 만들고 터미널에 아래와 같이 입력하여 package.json을 생성하고 Koa 라이브러리를 다운받자.
D:\toy\react\first_react\blog>mkdir blog-backend

D:\toy\react\first_react\blog>cd blog-backend

D:\toy\react\first_react\blog\blog-backend>npm init -y
Wrote to D:\toy\react\first_react\blog\blog-backend\package.json:

{
  "name": "blog-backend",
  "version": "1.0.0",
  "description": "",
  "main": "index.js",
  "scripts": {
    "test": "echo \"Error: no test specified\" && exit 1"
  },
  "keywords": [],
  "author": "",
  "license": "ISC"
}


D:\toy\react\first_react\blog\blog-backend>npm install koa

added 42 packages, and audited 43 packages in 2s

4 packages are looking for funding
  run `npm fund` for details

found 0 vulnerabilities
이제 해당 디렉토리를 인텔리제이에서 열기만 하면 된다.
프로젝트를 열었으면, 프로젝트 내부에 src 디렉토리를 만들고 index.js를 아래와 같이 생성한다.
◎index.js
const Koa = require('koa');

const app = new Koa();

app.use(ctx => {
    ctx.body = 'hollo world';
});

app.listen(4000, () => {
    console.log('Listening to port 4000');
});
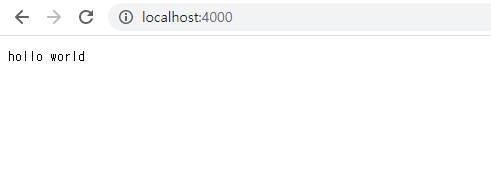
위 코드는 서버를 포트 4000번으로 열고, 서버에 접속하면 hello world 라는 텍스트를 반환하도록 작성한다.
끝이다.
터미널에서 node src (index.js는 하위 경로를 생략 가능)를 실행하면 해당 포트로 서버가 열린다! (신기...)

미들웨어
Koa App은 미들웨어의 배열로 구성되어 있다. 조금 전 코드에서 app.src 함수를 사용했는데, 이 함수는 미들웨어 함수를 App에 등록하는 함수이다.
미들웨어 함수는 아래와 같은 구조로 이뤄져 있다.
(ctx, next) => {
}
Koa의 미들웨어 함수는 두 개의 파라미터를 받는다. 첫 번째 파라미터는 위에서도 사용한 ctx라는 값이고, 두 번째 파라미터는 next이다.
ctx는 Context의 줄임말로 웹 요청과 응답에 관한 정보를 지니고 있다. next는 현재 처리 중인 미들웨어의 다음 미들웨어를 호출하는 함수이다. 미들웨어를 등록하고 next 함수를 호출하지 않으면, 그 다음 미들웨어를 처리하지 않는다.
위와 같이 next를 굳이 사용하지 않아도 되며, 주로 다음 미들웨어를 처리할 필요가 없는 라우트 미들웨어를 나중에 설정할 때 next를 생략한다.
아래 코드를 한번 확인해보자.
◎index.js
const Koa = require('koa');

const app = new Koa();

app.use((ctx, next) => {
    console.log(ctx.url);
    console.log(1);
    next();
});

app.use((ctx, next) => {
    console.log(2);
    next();
});

app.use(ctx => {
    ctx.body = 'hello world';
});


app.listen(4000, () => {
    console.log('Listening to port 4000');
});
이 코드로 서버를 올려보면, 페이지 요청과 아이콘 요청에 대한 url과 로그를 확인할 수 있다
Listening to port 4000
/
1
2
/favicon.ico
1
2
만약 첫 use 함수 내부의 next를 주석 처리하면?
Listening to port 4000
/
1
/favicon.ico
1
와 같이 첫 번째 미들웨어만 실행하고 그 아래에 있는 미들웨어는 모두 무시한다.
이러한 속성을 사용하여 조건부로 다음 미들웨어 처리를 무시하게 만들 수 있다.
◎index.js
const Koa = require('koa');

const app = new Koa();

app.use((ctx, next) => {
    console.log(ctx.url);
    console.log(1);

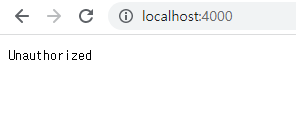
    if(ctx.query.authorized !== '1') {
        ctx.status = 401; // Unauthorized
        return;
    }

    next();
});

app.use((ctx, next) => {
    console.log(2);
    next();
});

app.use(ctx => {
    ctx.body = 'hello world';
});


app.listen(4000, () => {
    console.log('Listening to port 4000');
});

주로 웹 요청의 쿠키 혹은 헤더를 통해 이를 처리한다.
또한 next 함수는 Promise를 반환한다. next 함수가 반환하는 Promise는 다음에 처리해야 할 미들웨어가 끝나야 완료된다. 아래와 같이 next 함수 호출 이후에 then을 사용하여 Promise가 끝난 다음에 콘솔에 END를 기록하도록 수정하자.
app.use((ctx, next) => {
    console.log(ctx.url);
    console.log(1);

    if(ctx.query.authorized !== '1') {
        ctx.status = 401; // Unauthorized
        return;
    }

    next().then(() => {
        console.log("END");
    });
});
Listening to port 4000
/?authorized=1
1
2
END
혹은 async/await 문법을 지원하기 때문에 이를 사용해도 된다.
app.use(async (ctx, next) => {
    console.log(ctx.url);
    console.log(1);

    if(ctx.query.authorized !== '1') {
        ctx.status = 401; // Unauthorized
        return;
    }

    await next();
    console.log("END");
});
nodemon
서버 코드를 수정할 때마다 서버를 재시작하는 것이 꽤나 번거롭기 때문에 nodemon이라는 라이브러리를 설치하여 서버 코드가 변경될 때마다 자동으로 재시작하게 할 수 있다.
npm --include=dev nodemon

or

npm install nodemon
설치 후에 pakage.json에 scripts를 수정하여 서버 시작 명령어를 아래와 같이 분기하여 개발 환경에서만 자동 재시작하도록 설정해주면 된다.
◎pakage.json
{
  "name": "blog-backend",
  "version": "1.0.0",
  "description": "",
  "main": "index.js",
  "scripts": {
    "start": "node src",
    "start:dev": "nodemon --watch src/ src/index.js"
  },
  "keywords": [],
  "author": "",
  "license": "ISC",
  "dependencies": {
    "koa": "^2.14.1",
    "nodemon": "^2.0.22"
  }
}
npm run start:dev로 자동 재시작하는 서버를 실행할 수 있다.
koa-router
앞에서 리액트를 다루면서 웹 브라우저의 라우팅을 돕는 리액트 라우터 라이브러리를 사용했었는데, Koa를 사용할 때도 다른 주소로 요청이 들어올 경우에 다른 작업을 처리할 수 있도록 라우터를 설정해줄 수 있다.
npm install koa-router기본 사용법
index.js에서 라우터를 불러와 적용하는 방법은 아래와 같다.
◎index.js
const Koa = require('koa');
const Router = require('koa-router');

const app = new Koa();
const router = new Router();

// 라우터 설정
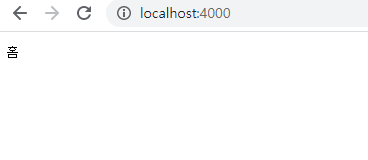
router.get('/', ctx => {
    ctx.body = '홈';
});
router.get('/about', ctx => {
    ctx.body = '소개';
});

// app 인스턴스에 라우터 적용
app.use(router.routes()).use(router.allowedMethods());

app.listen(4000, () => {
    console.log('Listening to port 4000');
});

라우트 파라미터와 쿼리
라우터의 파라미터를 설정할 때는 /about/:name 형식으로 : 을 사용하여 라우트 경로를 설정한다. 또한 파라미터가 있을 수도 있고, 없을 수도 있다면 /about/:name? 같은 형식으로 물음표를 사용하여 설정한다.
◎index.js
const Koa = require('koa');
const Router = require('koa-router');

const app = new Koa();
const router = new Router();

// 라우터 설정
router.get('/', ctx => {
    ctx.body = '홈';
});
router.get('/about/:name?', ctx => {
    const {name} = ctx.params;

    ctx.body = name ? `${name}의 소개` : '소개';
});

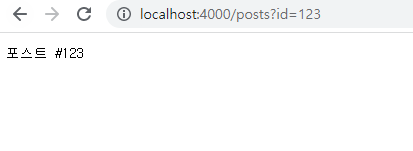
router.get('/posts', ctx => {
    const {id} = ctx.query;

    ctx.body = id ? `포스트 #${id}` : '포스트 아이디가 없습니다. ';
})

// app 인스턴스에 라우터 적용
app.use(router.routes()).use(router.allowedMethods());

app.listen(4000, () => {
    console.log('Listening to port 4000');
});
REST API
koa-router는 각기 다른 REST API 요청을 처리할 수 있다. 이를 사용하여 CRUD를 모두 구현할 수 있다.
GET, POST, DELETE, PATCH, PUT 등의 메서드를 모두 처리할 수 있으며, 이를 위해 라우트를 모듈화 하는 것이 좋다.
우선, 모듈화를 위해 api 디렉토리를 생성하고 index 파일을 하나 작성하자.
◎api/index.js
const Router = require('koa-router');
const api = new Router();

api.get('/test', ctx => {
    ctx.body = 'test 성공';
});

// 라우터를 내보낸다.
module.exports = api;
이 api index를 index.js에서 아래와 같이 호출하여 사용하도록 설정한다.
◎index.js
const Koa = require('koa');
const Router = require('koa-router');

const api = require('./api');

const app = new Koa();
const router = new Router();

router.use('/api', api.routes());

// app 인스턴스에 라우터 적용
app.use(router.routes()).use(router.allowedMethods());

app.listen(4000, () => {
    console.log('Listening to port 4000');
});
이제 api 내부에 posts 라우터를 만들어보자.
◎api/posts/index.js
const Router = require('koa-router');
const posts = new Router();

const printInfo = ctx => {
    ctx.body = {
        method: ctx.method,
        path: ctx.path,
        params: ctx.params
    };
};

posts.get('/', printInfo);
posts.post('/', printInfo);
posts.get('/:id', printInfo);
posts.delete('/:id', printInfo);
posts.put('/:id', printInfo);
posts.patch('/:id', printInfo);

module.exports = posts
posts의 여러 종류의 라우트를 설정하고 모두 printInfo 함수를 호출하도록 설정했다.
◎api/index.js
const Router = require('koa-router');
const api = new Router();

const posts = require('./posts');

api.use('/posts', posts.routes());

api.get('/test', ctx => {
    ctx.body = 'test 성공';
});

// 라우터를 내보낸다.
module.exports = api;
이제 포스트맨과 같은 API 요청을 보내는 툴로 모든 메서드로 요청을 보내보면,

아래와 같이 응답을 정상적으로 받을 수 있다.
컨트롤러 파일 작성
각 라우트의 처리 함수 코드가 길면 라우터 설정을 한 눈에 보기 힘들다. 그렇기 때문에 이 라우트 처리 함수들을 다른 파일로 따로 분리하여 관리할 수 있는데, 이 라우트 처리 함수만 모아 놓은 파일을 컨트롤러라고 한다.
데이터베이스 연결을 아직 하지 않은 상태이기 때문에 컨트롤러의 기능을 대략 알 수 있도록 임시로 구현하려고 한다.
우선, koa-bodyparser 미들웨어를 적용해야 한다. 이 미들웨어는 POST/PUT/PATCH 와 같은 메서드의 Request Body에 JSON 형식으로 데이터를 넣어주면, 이를 파싱하여 서버에서 사용할 수 있게 한다.
npm install koa-bodyparser라이브러리 설치 후에 index.js 에서 body-parser를 아래와 같이 적용해준다.
◎index.js
const Koa = require('koa');
const Router = require('koa-router');
const bodyParser = require('koa-bodyparser');

const api = require('./api');

const app = new Koa();
const router = new Router();

router.use('/api', api.routes());

// 라우터 적용 적엔 bodyParser 적용
app.use(bodyParser());

// app 인스턴스에 라우터 적용
app.use(router.routes()).use(router.allowedMethods());

app.listen(4000, () => {
    console.log('Listening to port 4000');
});
그리고 posts 경로에 posts 컨트롤러 파일을 작성한다.
◎posts.ctrl.js
let postId = 1;

const posts = [
    {
        id: 1,
        title: '제목',
        body: '내용'
    }
];


/*
* 포스트 작성
* POST /api/posts
* {title, body}
* */
exports.write = ctx => {
    // REST API의 Request Body는 ctx.request.body에서 조회할 수 있다.
    const {title, body} = ctx.request.body;
    postId += 1;
    const post = {id: postId, title, body};
    posts.push(post);
    ctx.body = post;
};

/*
* 포스트 목록 조회
* GET /api/posts
* */
exports.list = ctx => {
    ctx.body = posts;
};

/*
* 특정 포스트 조회
* GET /api/posts/:id
* */
exports.read = ctx => {
    const {id} = ctx.params;

    const post = posts.find(p => p.id.toString() === id);

    if(!post) {
        ctx.status = 404;
        ctx.body = {
            message: '포스트가 존재하지 않습니다.'
        };
        return;
    }
    ctx.body = post;
};

/*
* 특정 포스트 제거
* DELETE /api/posts/:id
* */
exports.remove = ctx => {
    const {id} = ctx.params;

    const index = posts.findIndex(p => p.id.toString === id);

    if(index === -1) {
        ctx.status = 404;
        ctx.body = {
            message: '포스트가 존재하지 않는다.'
        };
        return;
    }
    posts.splice(index, 1);
    ctx.status = 204;
};

/*
* 특정 포스트 수정(교체)
*  /api/posts/:id
* {title, body}
* */
exports.replace = ctx => {
    // PUT 메서드는 전체 포스트 정보를 입력하여 데이터를 통째로 교체할 때 사용한다.
    const {id} = ctx.params;

    const index = posts.findIndex(p => p.id.toString() === id);

    if(index === -1) {
        ctx.status = 404;
        ctx.body = {
            message: '포스트가 존재하지 않는다.'
        };
        return;
    }
    posts[index] = {
        id,
        ...ctx.request.body,
    };
    ctx.body = posts[index];
};

/*
* 특정 포스트 수정(특정 필드 교체)
*  /api/posts/:id
* {title, body}
* */
exports.update = ctx => {
    const{id} = ctx.params;

    const index = posts.findIndex(p => p.id.toString() === id);

    if(index === -1) {
        ctx.status = 404;
        ctx.body = {
            message: '포스트가 존재하지 않는다.'
        };
        return;
    }
    posts[index] = {
        ...posts[index],
        ...ctx.request.body
    };
    ctx.body = posts[index];
};
ctx.params로 파라미터를 읽어 오고 각 요청에 따른 작업을 마친 뒤에 ctx.body로 응답을 내보내는 간단한 코드이다.
이제, posts index에서 해당 요청들을 메서드에 맞게 맵핑해주기만 하면 된다.
◎posts/index.js
const Router = require('koa-router');
const postsCtrl = require('./posts.ctrl');

const posts = new Router();

const printInfo = ctx => {
    ctx.body = {
        method: ctx.method,
        path: ctx.path,
        params: ctx.params
    };
};

posts.get('/', postsCtrl.list);
posts.post('/', postsCtrl.write);
posts.get('/:id', postsCtrl.read);
posts.delete('/:id', postsCtrl.remove);
posts.put('/:id', postsCtrl.replace);
posts.patch('/:id', postsCtrl.update);

module.exports = posts
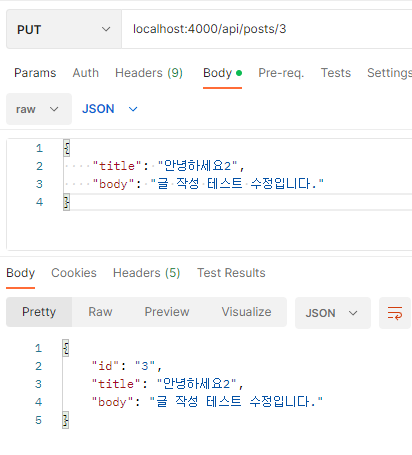
잘 동작하는 걸 확인할 수 있다.
다음엔 MongoDB를 연결해보려고 한다.
끝!
'WEB > Node' 카테고리의 다른 글
| [Node] 인증 관리: JWT(JSON Web Token) (0) | 2023.04.11 |
|---|---|
| [Node] DB 연동: Sequelize (0) | 2023.04.11 |
- Async
- 맛집
- 정보보안기사 #실기 #정리
- redux-thunk
- react
- await
- 이탈리안 레스토랑
- Promise
- 인천 구월동 이탈리안 맛집
- AsyncStorage
- javascript
- 인천 구월동 맛집
- redux
- 파니노구스토
- react-native
- Total
- Today
- Yesterday


